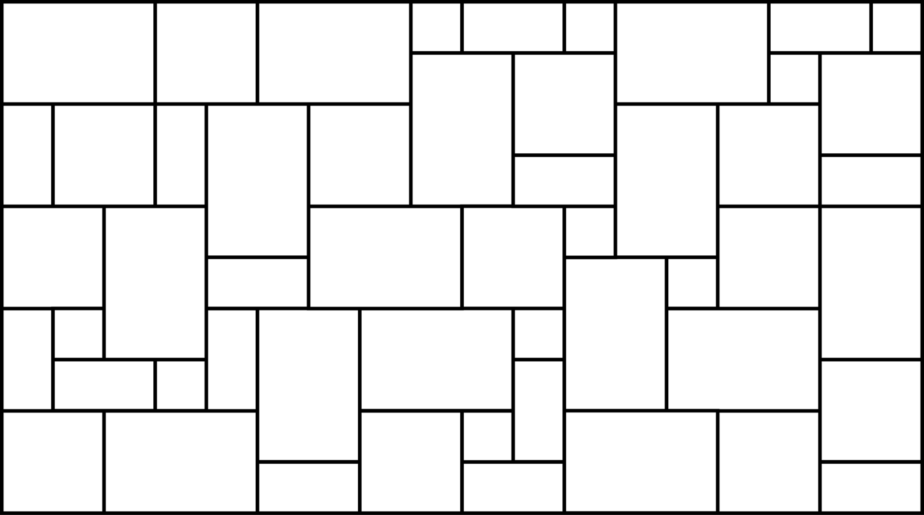
17m² Patio Pack layout example
Layout Tips
DO:
- Select from all your flags to get a good colour mix
- Take from multiple packs at a time to avoid colour banding
DON’T:
- Use too many of the same size flag next to each other
- Have any straight lines that are too long (no more than 3 metres)
- Have the corners of 4 flags meet at the same point
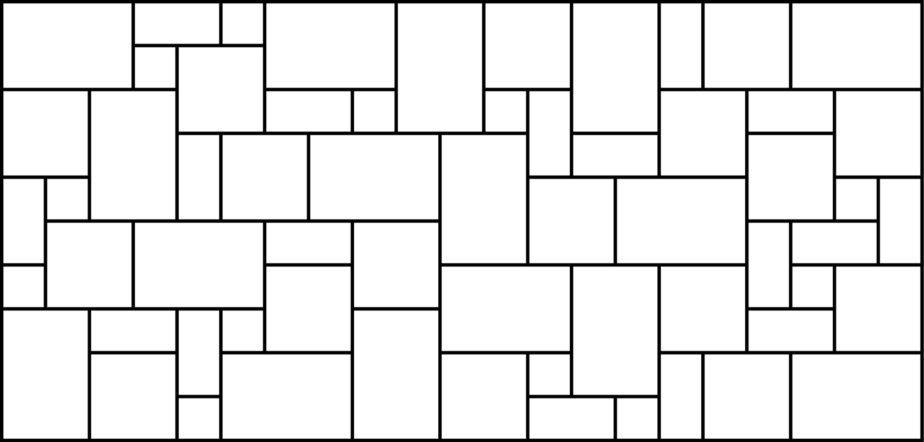
19m² Patio Pack layout example – rectangle
19m² Patio Pack layout example – loose

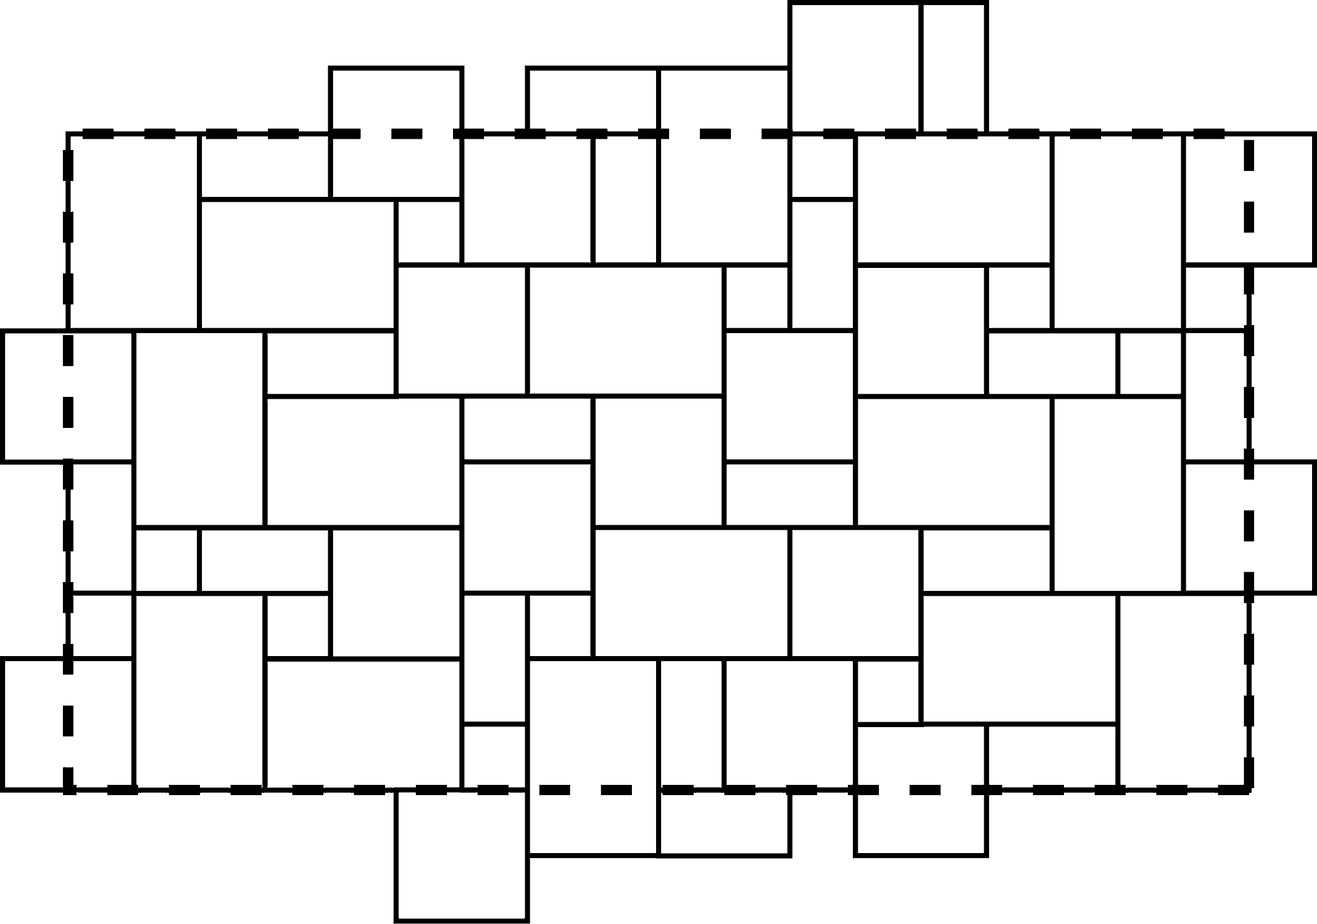
15.25m² Patio Pack layout example – rectangle
Your guide for using our products at home
For the majority of people the best and most professional results for laying your natural stone paving will come from hiring competent, experienced contractors with a good reputation that you have thoroughly researched and who you have confidence in. Remember to make sure that you have your products delivered before actually hiring any builders or equipment to avoid any delays leaving you out of pocket.
But if you are planning on doing it yourself, in this guide we’re going to walk you through the general process for how to lay natural stone paving from the Ammaari Stones range. From planning to execution, we give you the basics for using our products to make the most out of your home landscaping project. So without any further ado, let’s get started.
Step 1: Planning
Before starting any project laying Ammaari’s natural stone paving it is important to plan which materials you need and when you will need them – doing this will ensure that you won’t purchase any materials you don’t need and that they arrive on-site in the correct order.
Take a piece of graph paper and select an easy to use ratio e.g. 2:100cm (so every 2cm on your graph paper is 100cm in your garden).
Start your plan by drawing in any fixed objects (such as buildings). Next, make several photocopies of this plan to allow for many brainstorming sessions!
Roughly sketch ideas onto your plan, and once you have a design you feel happy with draw in the areas selected for paving fully (using your plan’s ratio as a guide to sizes). You will now get a good feel for how your garden will look, and have the advantage of knowing exactly how many of which size and colour flags you will need. Move the flags around if extensive cutting is needed – this will save both time and money.
Use this plan and the pack size details on this page to help you decide which Ammaari natural stone paving packs you need along with your other materials, and you should aim to have the flags delivered 2 or 3 days before your project begins and store them on dry, solid ground near the working area.
Step 2: Site Preparation
Ensure good stability for years to come by making sure the area is firm and well drained before starting.
We recommend all vegetation and topsoil is removed to a depth of 200mm, and at a gradient of 1:60 away from any buildings to allow for drainage.
Then lay at least 75mm of deep sub base (up to 150mm) and compact, making sure there are no voids left, to end up with 50-100mm of compacted base.
Your finished natural stone paving surface should be a minimum of 150mm below the level of any damp proof course.
Step 3: Laying
Start by laying full flags adjacent to the building that’s most prominent in your design, leading out towards the edge that can be most easily adjusted when laying. If this is not possible, starting from a corner and laying outwards in a fan motion will provide the best result.
We always recommend that you open and pick from several packs simultaneously to ensure you get a nice even end result in terms of colour variation. Make sure that you have planned the layout of the flags if using multiple sizes such as our popular “Patio Packs”.
Using a 4:1 mix of sharp sand to cement for the mortar, lay a full bed for each flag individually to carefully control the amount allowing for the natural variation is thicknesses between each stone. The side with the largest surface area is the top! Tap down into place with a rubber mallet, leaving a 10mm gap for pointing. Ensure you keep the right level with string, planks or long spirit level.
Step 4: Pointing
Pointing can be done as you go along during step 3. After a few square metres or 15 mins of laying, go back over the area just laid and rake and smooth out the mortar between the joints (an old broom handle often does the trick if you don’t have a pointing tool). Take care not to leave any wet mix on the surface – it will leave stains. If any has slipped on then wash off immediately with warm water and a sponge.
Alternatively, some nice jointing compounds can be found on the market to give a wider choice of colours and finishes. If using one of these, be sure to follow the instructions for the individual product you are using.
Following these simple steps, and allowing 24-48 hours to dry, should give you a durable and beautiful natural stone paved area suitable for foot traffic of any kind.
If you have any questions about the Ammaari Stones range or need any further advice, we are happy to support you at every stage, so feel free to give us a call on 01772 369007 or get in touch by clicking here.